Tutorial
Introduction
In this tutorial we will show you how to setup your Data Layer using SSW.DataOnion2 nuget packages. Source code for sample project used in this tutorial can be downloaded here (for EF6 sample) and here (for EF7 sample).
Step 1 – Creating Domain Model
Lets assume a very basic online shop scenario. We are going to have four main entities:
- Product
- ProductCategory
- Order
- OrderLineItem.
Open Visual Studio and create new Class Library project called MySample.Entities by going to File | New | Project and selecting Class Library
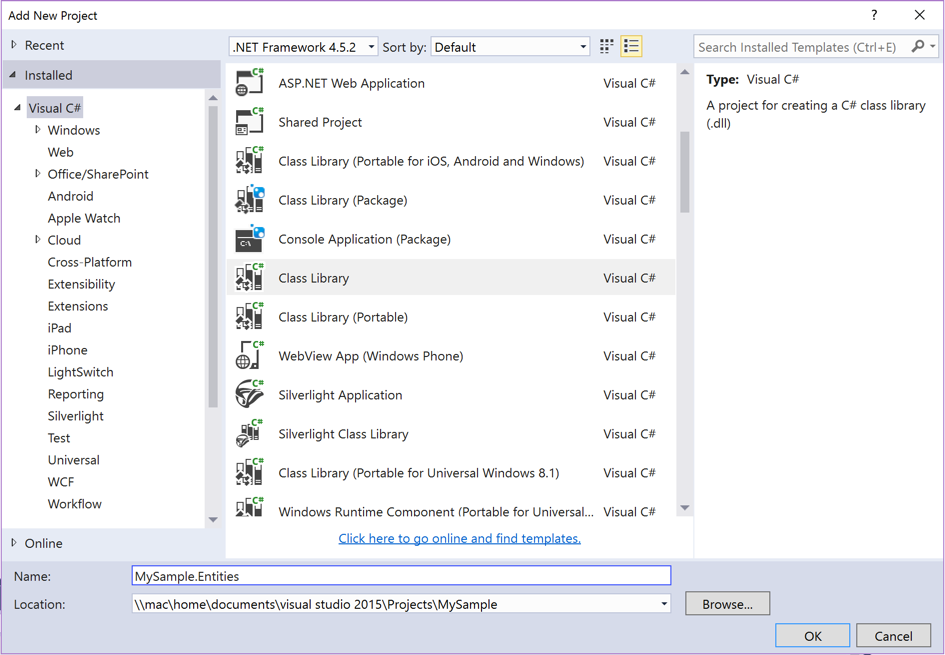
Figure: Add new Entities project as a Class Library
Once Entities project is created, delete default Class1.cs file. Now create four classes Product.cs, ProductCategory.cs, Order.cs and OrderLineItem.cs (follow links for source code).
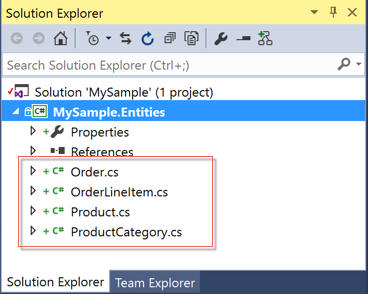
Figure: Add ProductCategory.cs, Product.cs, Order.cs and OrderLineItem.cs entities.
Step 2 – Add Data Project
Our Entities project is now complete, it is time to add new project to hold database context.
Right click solution file and create two new class library projects MySample.Data
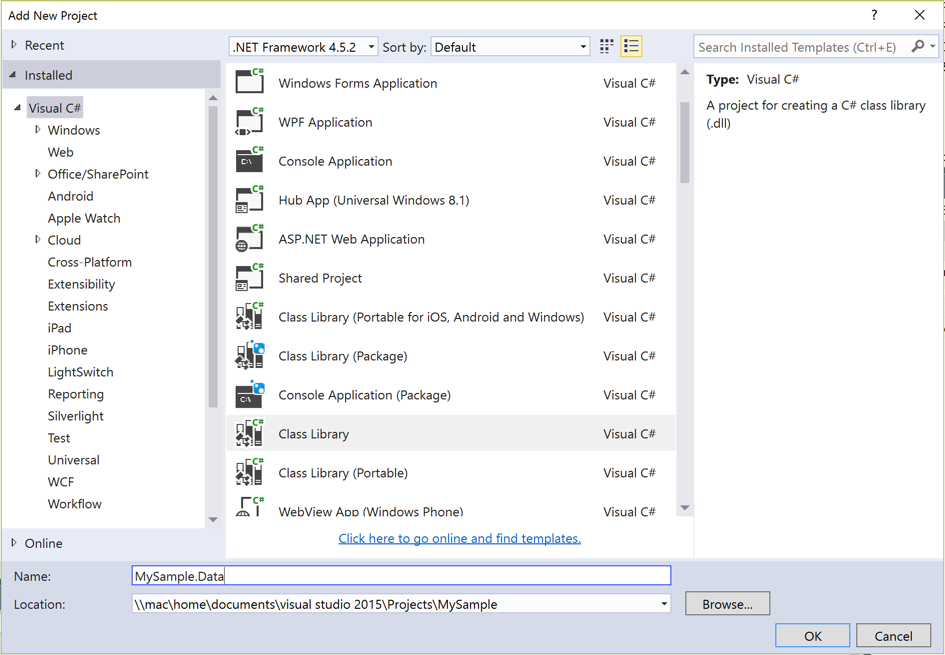
Figure: Add new project MySample.Data
Once this project is created, add the reference to MySample.Entities project by right clicking project file and selecting Add | Reference.
Now, we need to add EntityFramework nuget package. Go to Package Manager Console and type
Install-Package EntityFramework -ProjectName MySample.Data
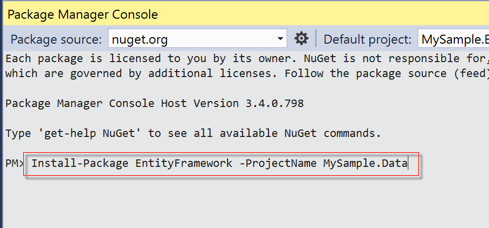
Figure: Adding EntityFramework nuget package
Now we can create our DbContext. Right click MySample.Data project and add new class called MySampleDbContext.cs and populate it with source code found here. You solution explorer should look like this:
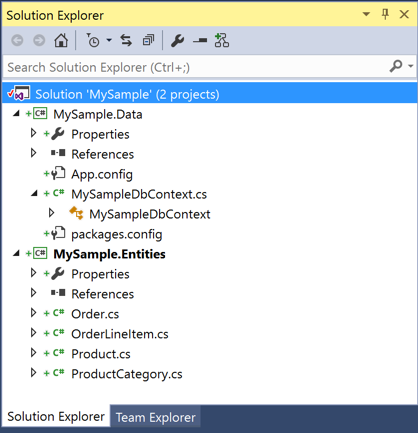
Figure: Solution structure
We also need to specify connection string in App.config so that DbContext knows how to connect to database. Open App.config file and paste the following connection string section (adjust if your SQL server instance is different).
Once connection string is configured, we can enable code-first migrations. Open Package Manager Console and type:
Enable-Migrations -ProjectName MySample.Data -StartupProjectName MySample.Data
This will create new Migrations folder in MySample.Data project. Next, create our first migration, by typing the following in Package Manager Console:
Add-Migration Initial_Create -ProjectName MySample.Data -StartupProjectName MySample.Data
Another useful thing we could do, is to populate initial data into our database when it gets created. DataOnion2 exposes IDataSeeder interface that can be implemented to seed initial data. In your package manager console, run the following command:
For EF6:
Install-Package SSW.DataOnion.Interfaces.EF6 -Pre -ProjectName MySample.App
For EF7:
Install-Package SSW.DataOnion.Interfaces -Pre -ProjectName MySample.App
Once package is added, IDataSeeder interface is available. Let’s implement it. In MySample.Data project create new folder called SampleData and add new class to it called SampleDataSeeder.cs. Copy paste implementation for it from here.
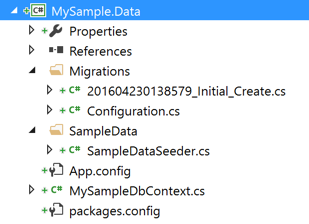
Figure: Final MySample.Data project
Step 3 – Configure Data Onion
The next step is to configure Data Onion in your client or UI project. For simplicity, let’s create new Console Application. Right click solution file and use Add | New Project. Name your project MySample.App and make it a startup project by right clicking project and selecting Set as a startup project option.
Add references to MySample.Entities and MySample.Data.
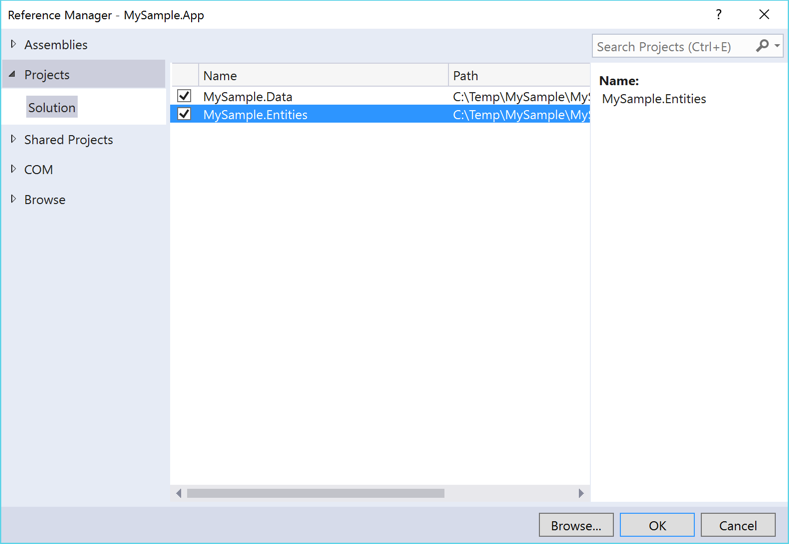
Figure: Add project references to MySample.App
The easiest way to configure DataOnion is to use DI (dependency injection) container. EF6 version of DataOnion2 comes with Autofac implementation out of the box, while EF7 version of DataOnion2 comes with Autofac and Microsoft implementations. If you are using any other DI container, please check our documentation here (for EF6) and here (for EF7).
Let’s configure our console application with Autofac. Go to your Package Manager Console and run the following command:
For EF6:
Install-Package SSW.DataOnion.DependencyResolution.Autofac.EF6 -Pre -ProjectName MySample.App
For EF7:
Install-Package SSW.DataOnion.DependencyResolution.Autofac -Pre -ProjectName MySample.App
This package will also install all required DataOnion dependencies, including EntityFramework. We will also need to configure connection string for our database. Copy paste your connection string settings from MySample.Data project into App.config of MySample.App project. Alternatively, you can copy it from here.
Now, open Program.cs file and paste implementation from here. Your Program.cs file should look like this:
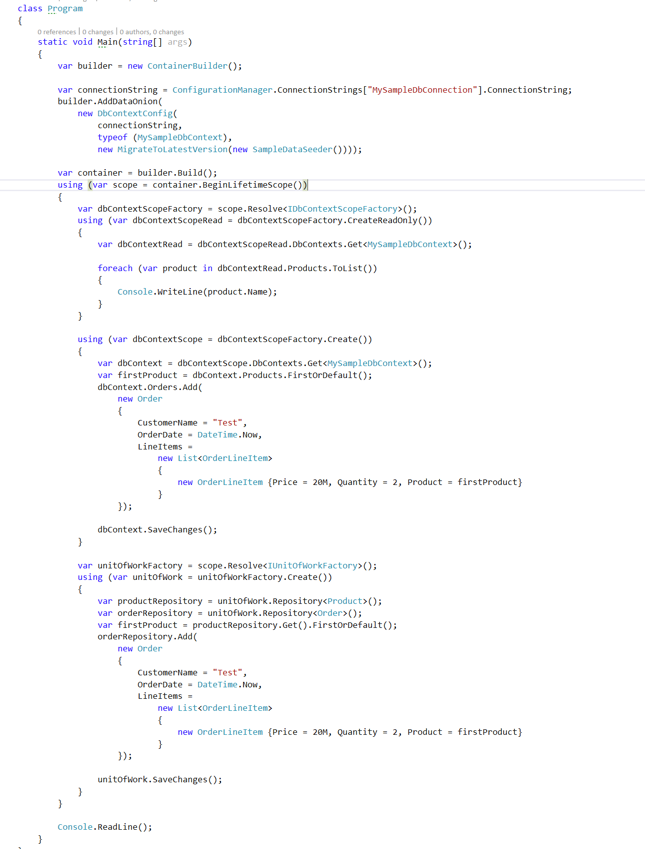
Figure: Data onion configuration and usage.
Here is an explanation for each section of the code:
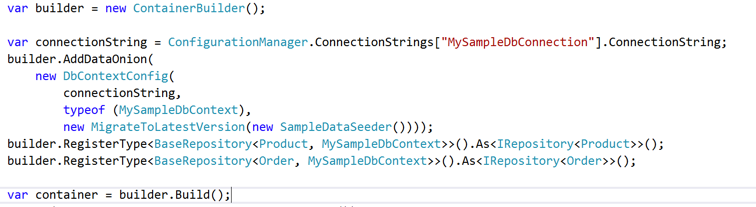
Figure: Creating DI container and enabling DataOnion. For DataOnion you need to specify connection string, type of DbContext, initialiser and optional DataSeeder. We also configured two repositories that will be used when using UnitOfWork and repository pattern.
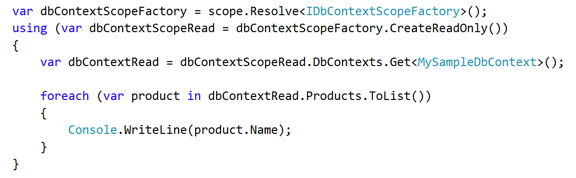
Figure: DataOnion manages lifecycle of your DbContext via DbContextScope. DbContextScope can be created using factory. In this section we are creating ReadOnly version of DbContext scope and querying all available products. “using” block represents your business transaction.
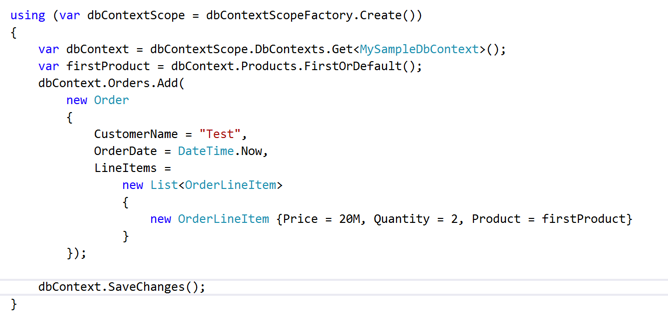
Figure: In this section we are creating full version of DbContext scope and creating new Order that will be persisted to database.. “using” block represents your business transaction.
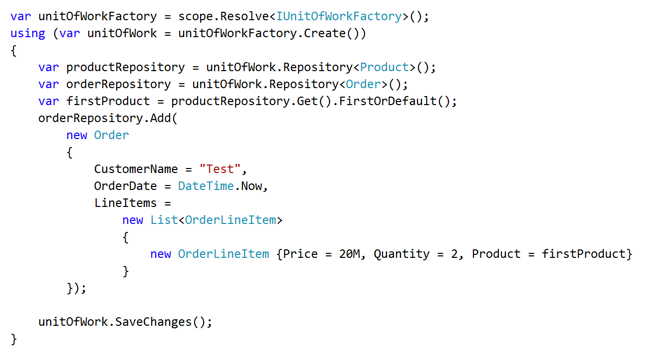
Figure: As well as supporting direct interaction with DbContext, DataOnion also allows you to abstract away your DbContext interaction via UnitOfWork and Repository pattern. This is done by using UnitOfWorkFactory class. UnitOfWork can create relevant repositories automatically for you. In this section we are creating full version of UnitOfWork, resolving 2 repositories and creating new Order entity that will be persisted back to your database. “using” block represents your business transaction.
Step 4 – Test your application
Build and run your application. You should get the following output in Console:
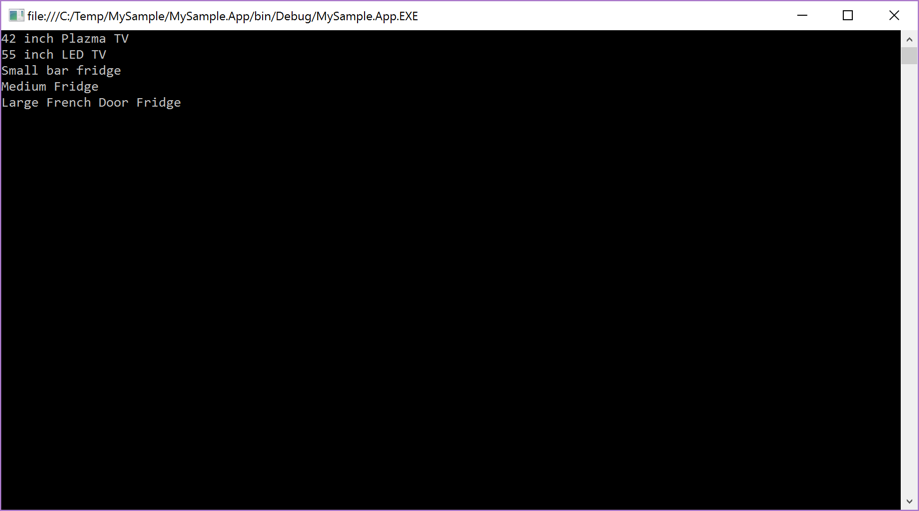
Figure: Sample app output.
If you check you Sql Server database, you should see new MySample database created
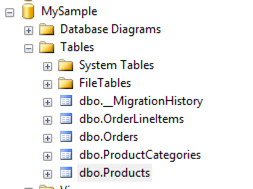
Figure: Database automatically created by DataOnion